Introdução

If your Acer Aspire 3 A315-24PT-R288 Screen is black or cracked or otherwise broken this guide is for you. In this guide we will go over the 7 steps to take off the screen on the Acer Aspire 3 A315-24PT-R288 to replace it.

  1. af6TWBXQwoyGnOEy
    af6TWBXQwoyGnOEy
    oOQ6KrTjSlKiqRi3
    • For your safety, unplug all peripheries, discharge the battery below 25%, and power down your device before beginning disassembly.

    • Use a Phillips screwdriver to remove the eleven 2 mm screws that secure the lower case.

  2. qa4OZosd5ygHyMYn
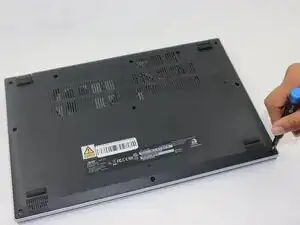
    • Insert an opening pick in the seam between the chassis and the lower case.

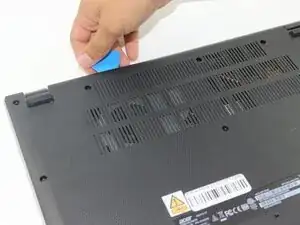
    • Slide the opening pick around the entire perimeter, prying every couple of centimeters, to release all of the retaining clips that secure the lower case.

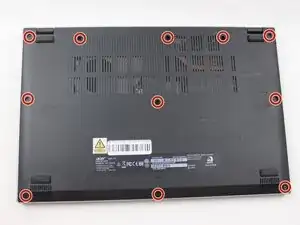
    • Remove the lower case.

    Dont be shy on this. You need to get between the cover and the case and push the cover inwards away from the outer case to release each clip. Hardest section is front of the computer.

    mail -

  3. KKWcalhbbNiYABJV
    • Remove the tape on the battery connector using tweezers or your fingers.

  4. XBkJbZJX63IKiIaO
    XBkJbZJX63IKiIaO
    ujiXrulWBYQXEaPe
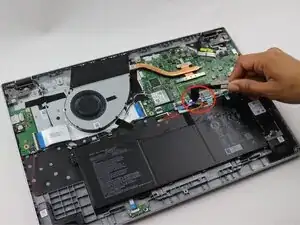
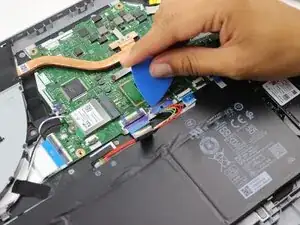
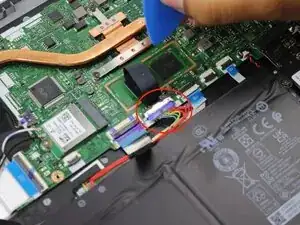
    • Use an opening pick or the flat end of a spudger to gently push the battery connector out of its motherboard socket.

  5. BrMCvKyvYmcMwQig
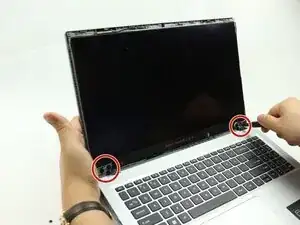
    • Flip the laptop over and open the lid.

    • Insert an opening pick in the seam between the bezel and screen.

    • Pry around the entire perimeter of the bezel to release the clips.
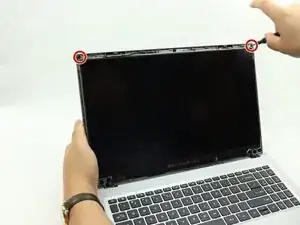
    • Remove the bezel.

  6. CdapSccJZSKRf45f
    • Remove both of the 2 mm screws at the top-left and top-right corners of the screen.

    You mentioned 4 screws but only circled 2 and we are having trouble finding the other 2 screws.

    Maxwell Cash -

  7. Py1uNfHHeYbBrjAJ
    • Remove the eight 3 mm screws that secure the hinge to the display assembly.

    • There are four screws on each hinge.

  8. lZqDdonTxKyeuAsc
    • Disconnect the small press connector on the top-left side of the screen.

  9. QAJaYWVC5fBn62R2
    • Dislodge the cords from their retaining hooks.

  10. yEGRTGXvywjRbrKv
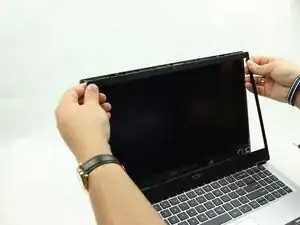
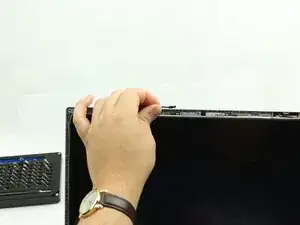
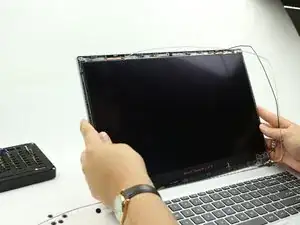
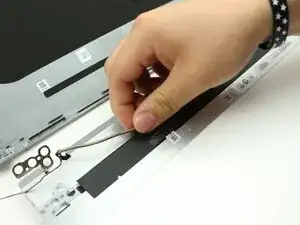
    • Gently lift the screen away from the display assembly, with care not to strain the connected cables.

  11. NuSwTF2kDFb6Cph1
    NuSwTF2kDFb6Cph1
    YVDWO1XCujbnfYEw
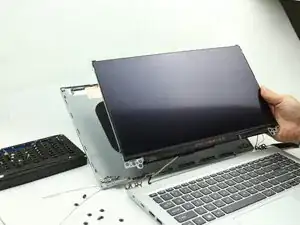
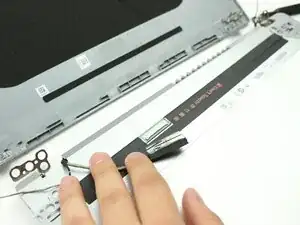
    • Lay down the screen flat with the back facing you.

    • Flip up the display connector locking bar.

    • Pull the display connector directly out of its socket.

    • Remove the screen.

    You need to correct "backup", you need a space in between the words because you're saying the back of the device needs to be propped up.

    Maxwell Cash -

Conclusão

To reassemble your device, follow the above steps in reverse order.
Take your e-waste to an R2 or e-Stewards certified recycler.
Repair didn’t go as planned? Try some basic troubleshooting or ask our Answers community for help.

Zachariah Fernandez

Membro desde: 19/02/25

337 Reputação

0 comentários