Introdução
Before you get started, make sure you have a PH1 screwdriver, a clean work area and an optional plastic pry tool.
-
-
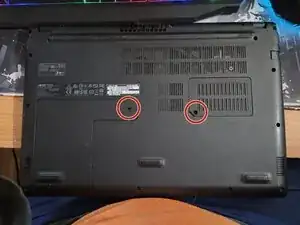
First, remove the 2 screws that hold the hard drive cover and the RAM cover. Remove the covers.
-
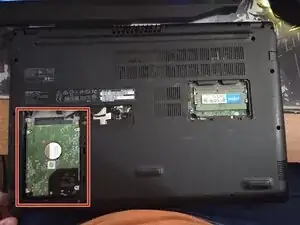
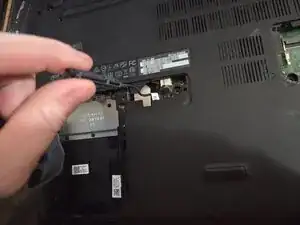
Next, carefully pick up the hard drive and disconnect the SATA cable at the top of it (the only cable connected to it).
-
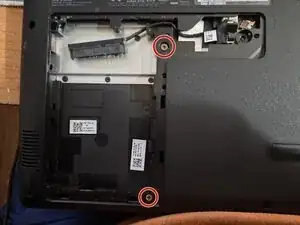
Then, remove the 2 screws next to where the hard drive sat.
-
-
-
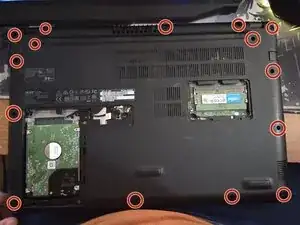
Remove the 15 screws that are marked.
-
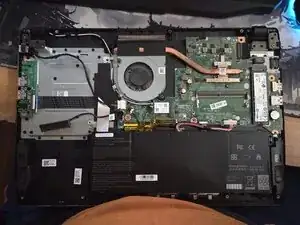
Then, carefully use your fingers (or the plastic pry tool) to pick the cover up off the main frame of the laptop. It is plastic, so be careful.
-
Be very careful when removing the main cover, the SATA cable is wrapped around part of the cover and will need to be un wrapped before fully removing the cover.
-
-
-
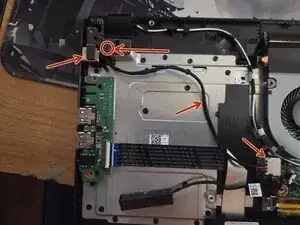
Here is where the power jack is located. Remove the screw(s) on the latch and flip the latch up. The power jack should be loose now
-
Make your way to the connector. There is a little tab on the removable side. Push it so that the connector slides out.
-
From here, install the new power jack and reinstall everything in reverse order.
-
To reassemble your device, follow these instructions in reverse order.
