
Introdução
This is a step-by-step guide for replacing the Air Filter in a 2018 Dodge Journey SE with a 4-cylinder, 2.4-liter engine. The guide is set up to be easy to follow, and the process should only take 15 minutes or less to complete. The most important thing to remember when reading this guide is to focus on one step at a time to avoid becoming overwhelmed. This vehicle's essential maintenance task is to keep the proper air-to-fuel ratio. You should check the air filter when you change the oil to see if it also needs to be changed.
Ferramentas
-
-
Pull the hood release lever located on the car's driver's side where the pedals are until you hear the latch release with a click.
-
Go to the front of the vehicle and press the latch under the hood to the side to raise the hood.
-
Make sure to secure it in place.
-
-
-
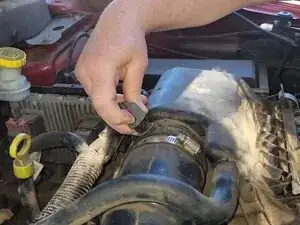
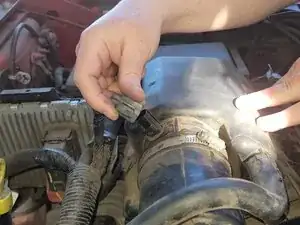
Using your thumb, press the tab on the mass air flow sensor.
-
Once the tab lock is released, pull up on the connector to detach the mass air flow sensor connector, which is located on top of the air filter housing.
-
-
-
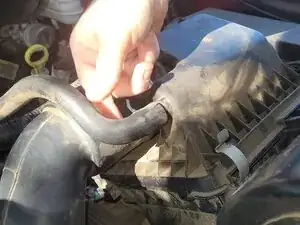
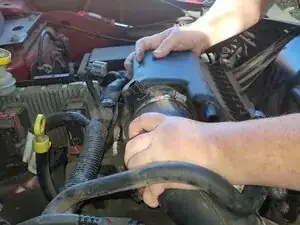
Remove the smaller hose, the breather hose, by wiggling it off the air filter housing.
-
Wiggle and pull away from the air filter housing.
-
-
-
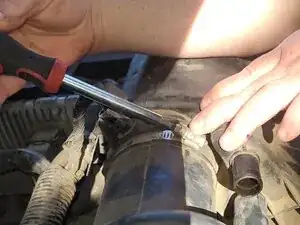
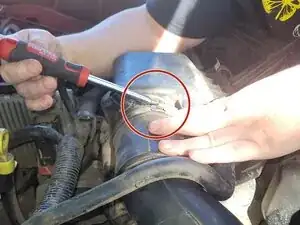
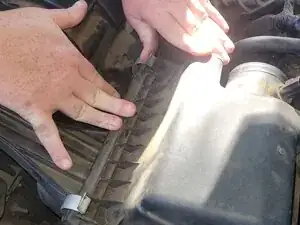
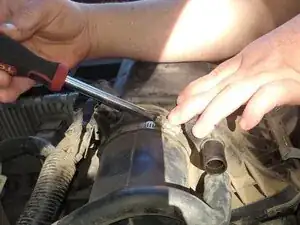
Using the flat-head screwdriver, loosen the hose clamp attached to the air intake hose counterclockwise (lefty loosie).
-
-
-
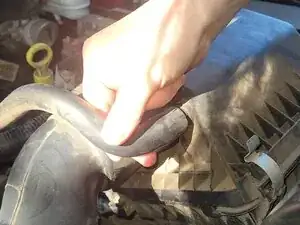
Remove the hose from the air filter housing.
-
Like with the breather hose, wiggle and pull away from the air filter housing.
-
-
-
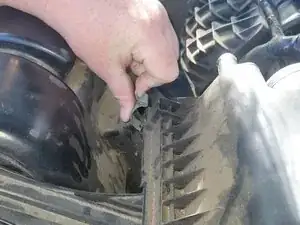
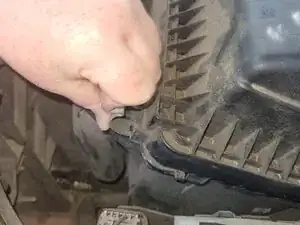
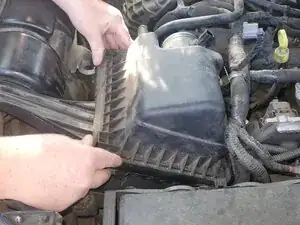
Press the two clips on the front of the air filter housing closest to the front end of the car towards yourself and down to release them.
-
Lift the cover while pulling it towards yourself to remove it. Set aside for next steps.
-
-
-
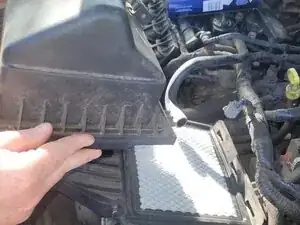
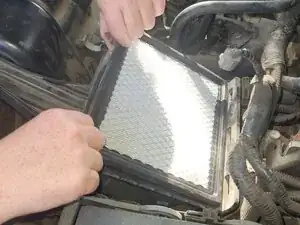
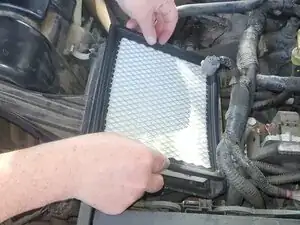
Lift the old air filter out by pulling away from the housing in an upward motion.
-
Dispose of the old air filter. In many places, air filters are accepted at local recycling plants.
-
-
-
Pull the new air filter out of the box, making sure it matches the old Filter's shape and size.
-
Place the new air filter inside the housing, with the rubber side up and the fans facing down.
-
-
-
To replace the cover of the air filter housing, line the three pegs up with the holes in the back and push in and down to snap into place.
-
Reclip the housing clips by pushing them up and over the lip of the air filter housing. There should be a snapping sound.
-
-
-
Reattach the air intake hose by pressing it and wiggling it toward the air filter housing.
-
Tighten the hose clamp by using the flat-head screwdriver in a clockwise direction (righty tighty).
-
-
-
Reattach the breather hose by pressing it and wiggling it back onto the stem you detached it from, pushing toward the air filter housing.
-
-
-
Line the mass air flow sensor connector up with the plug-in you removed it from.
-
Press down until the connector snaps into place and locks.
-
At this point, you are done and can close the hood of the vehicle.
-


Please make sure all parts are fully secured at the end before closing the car's hood.
Um comentário
Excellent Instructions. Thank you so very much!!!!! This worked perfectly for my 2015 2.4 L Journey. Thanks again!!!
Ray -