Introdução
Use this guide to replace the rear speaker suspension on a 2015-2023 Toyota Tacoma. Factory speakers are typically made of paper composite materials, and the outer suspension (surround) can crack, tear, or deteriorate due to exposure to heat and moisture from the elements, as well as normal wear and tear. A faulty suspension causes rattling and distortion; if ignored, it can overwork the voice coil in the speaker and short out the radio's speaker channel. This repair, if done early, can restore sound quality to normal and help avoid more costly speaker or radio repairs in the future.
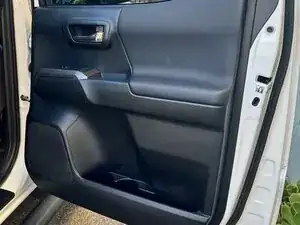
This guide will help you step by step to remove the door panel, remove the speaker, and remove the damaged suspension to replace it with a new surround. No special skills are required, just patience and careful gluing.
Ferramentas
-
-
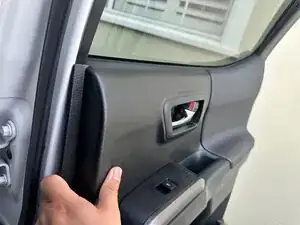
Open the rear door fully.
-
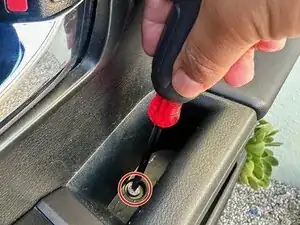
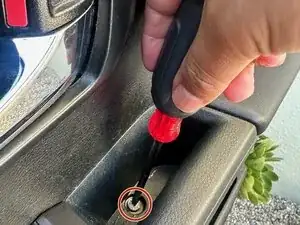
Use a pry tool to remove the plastic cover by sliding it behind the cover and snapping it off.
-
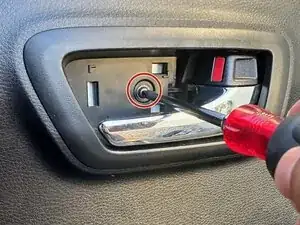
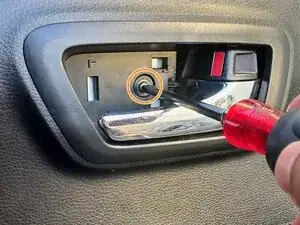
Remove the 8 mm screw holding the door handle frame in place using a Phillips screwdriver.
-
-
-
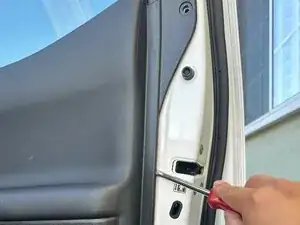
Remove the 15 mm screw that secures the door panel at the bottom of the door pull area by using a Phillips screwdriver.
-
-
-
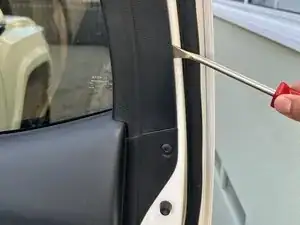
Unclip the top panel covering extension using the pry tool. Be sure to collect all the clips in case they fall off.
-
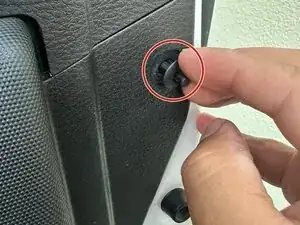
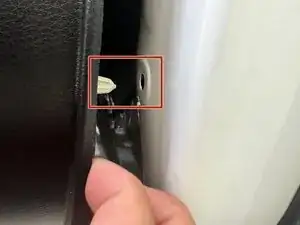
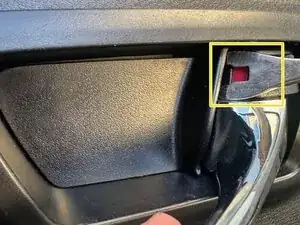
Remove the black clip by pushing in the center pin with a small flathead screwdriver or pin tool to pull it out of the hole.
-
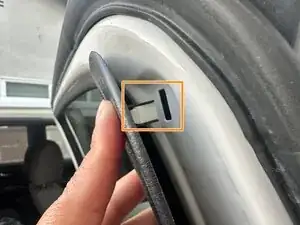
Pry the door panel away from the door frame by unclipping the plastic pins that secure it around the door.
-
-
-
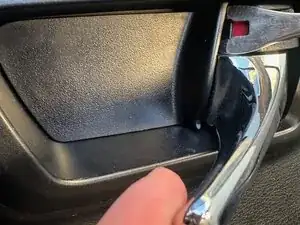
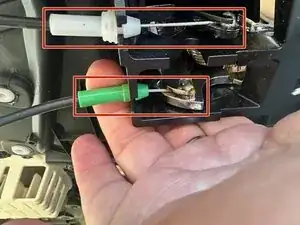
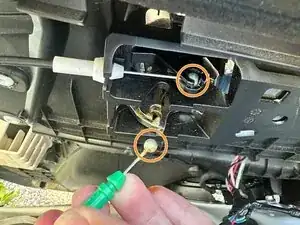
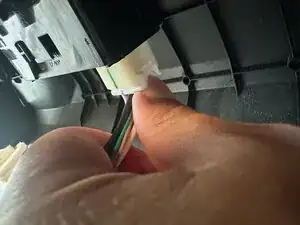
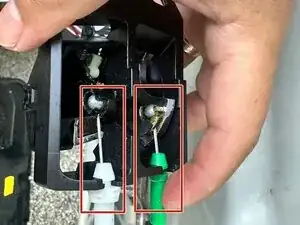
Disconnect the latch wires, which are in green and white plastic, from the black groove channel on the back of the door handle.
-
Unhook the ball joint from the handle area, and the door handle will be completely free.
-
-
-
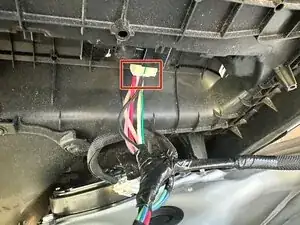
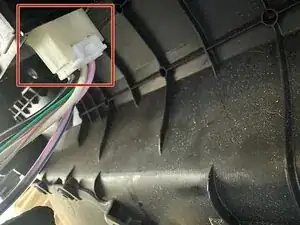
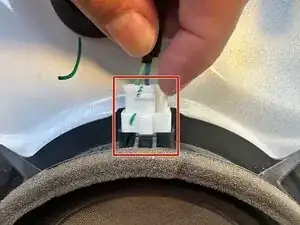
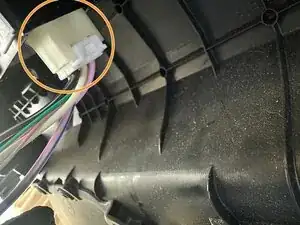
Push the release tab on the window module harness and pull it down to disconnect.
-
Remove the panel and place it on a flat surface or on the floor to avoid damage.
-
-
-
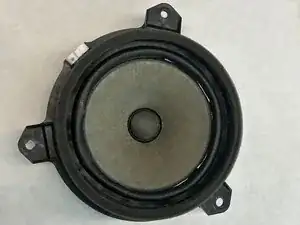
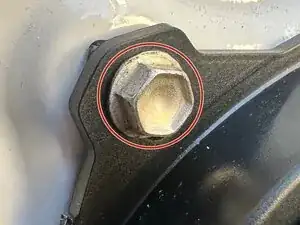
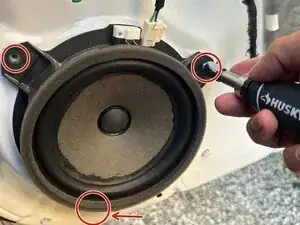
Unscrew the three 15mm hex-bolts surrounding the speaker. The speaker will be totally detached and ready to repair.
-
Pull the speaker free to begin the suspension repair.
-
-
-
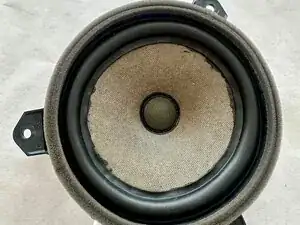
Remove any remaining pieces of the old suspension before installing a new one.
-
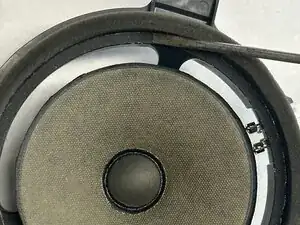
The speaker suspension may be visibly torn or possibly fully disintegrated due to exposure to the elements.
-
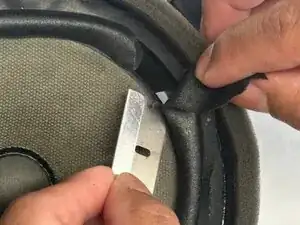
Remove the torn suspension parts still attached to the speaker cone with a blade.
-
Use a scraper to clean the speaker frame of suspension remnants.
-
-
-
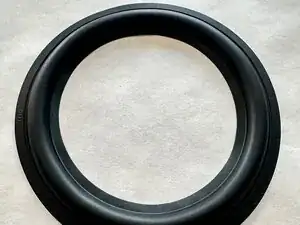
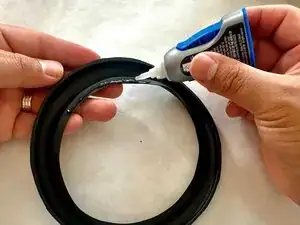
Apply super glue generously to both flat surfaces on the back side of the new suspension.
-
Install the new suspension by adhering the bottom part to the speaker's paper cone and the top part to the metal frame of the speaker.
-
Press down gently with your finger to ensure proper contact between the suspension and the speaker surfaces.
-
-
-
Press down gently on the speaker's cone to ensure the new suspension is fully adhered.
-
Place the speaker back into position on the truck door and secure it with the three 15 mm bolts.
-
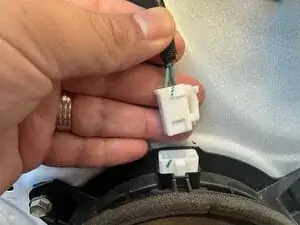
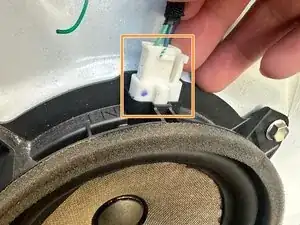
Reconnect the wire harness at the top of the speaker.
-
-
-
Reconnect the white and green latch wires behind the door handle to the door.
-
Reconnect the window module harness.
-
-
-
Align the panel clips with the door frame holes and push them into place by gently pressing on the panel.
-
Reinstall the small panel on top and push it gently into place when it aligns.
-
-
-
Reinstall the 15 mm screw with the Phillips screwdriver securing the door panel.
-
Reinstall the 8 mm screw with the Phillips screwdriver to secure the door handle.
-
Reinstall the black cover over the door handle screw.
-


You've successfully replaced the speaker suspension and restored your Tacoma's sound quality. Test the sound before closing up the door panel to ensure the speaker is working properly. A clean repair like this can extend the life of your speakers and stereo, while keeping your audio crisp for years to come.