Introdução

This guide will show you how to properly replace the sun visor in a 2008-2013 Toyota Highlander.

A sun visor can fail for many reasons, such as broken hinges or a visor that won’t stay up. Repairing a damaged sun visor is important, as a malfunctioning visor can distract the driver or fail to block bright sunlight, creating a safety risk.

Before you begin the repair, ensure that the vehicle is parked and the parking brake is engaged. Adjust your seat so you can comfortably sit in an upright position for an extended period of time.

  1. aH21CafMGetXZtHN
    aH21CafMGetXZtHN
    eEppxjYTbHRqCaad
    • If the sun visor is folded up, fold it down.

  2. mZd1YQaii21x3KQD
    • Unclip the sun visor from the inside hook on the ceiling of the passenger side.

  3. 15CxYtD5RJMmjMbF
    15CxYtD5RJMmjMbF
    gZEES6O4B3c5yjGV
    3xwDoMyUdFPTWKAK
    • Move the sun visor to the side in order to allow for easier access to the plastic cover.

    • If you are replacing the driver side sun visor, move the sun visor to your left; if you are replacing the passenger side sun visor, move the sun visor to your right.

  4. aeBXX12GEmUGq1Ft
    aeBXX12GEmUGq1Ft
    n15xA6fGLBsHLpBv
    f4uBQVcy4Hkyb2Cr
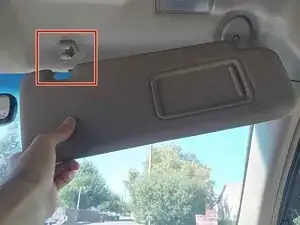
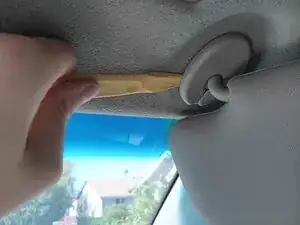
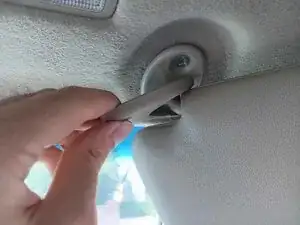
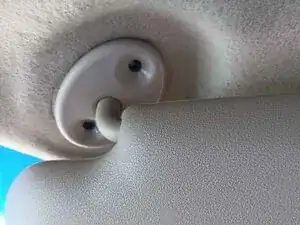
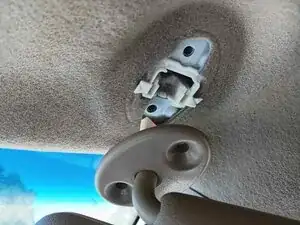
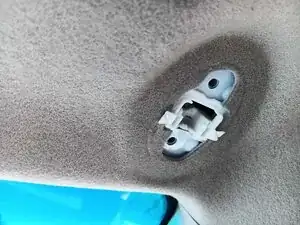
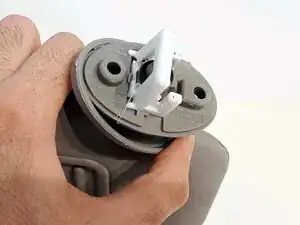
    • Use a trim removal tool or a plastic opening tool to gently pry the plastic cover from the base of the visor.

  5. 3yYpmyMgMZTvAjNq
    3yYpmyMgMZTvAjNq
    MrBBcJyyS1aP15p3
    P22by2UY3ZOFExVB
    • Remove the plastic cover by pulling it back and wiggling it free from the sun visor.

    • Don't be afraid to use a little force—the cover is made out of a soft plastic, so it won't break easily.

  6. SfkpkyCTltVJqmhT
    SfkpkyCTltVJqmhT
    t2OIeRIvVrWCdFXr
    pBcQnR6OmSpHXeEo
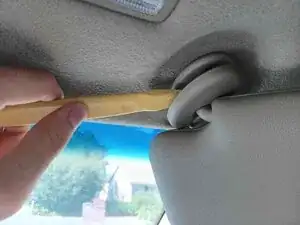
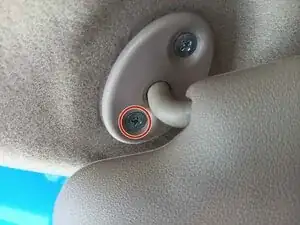
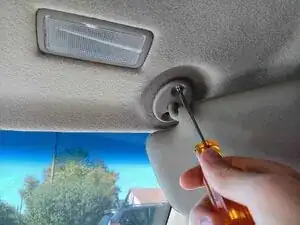
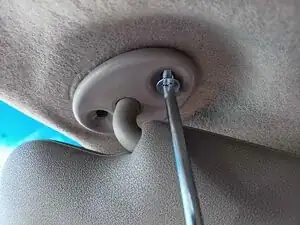
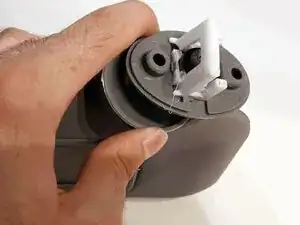
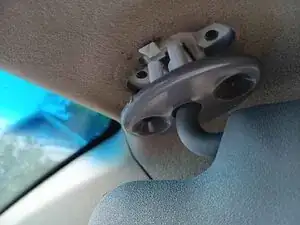
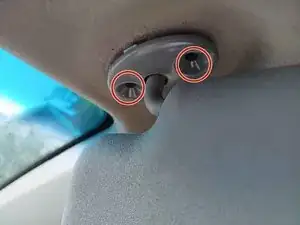
    • Use a Phillips #2 screwdriver to remove the bottom 2.5 mm screw from the plastic base of the sun visor.

  7. uS63mE3KKhDoRXc1
    uS63mE3KKhDoRXc1
    21OqSKHsAbaHFjXG
    CIt2aAmMJOJDBbMY
    • Use the Phillips #2 screwdriver to remove the top 2.5 mm screw.

    • Support the sun visor with your free hand while removing the second screw to prevent it from falling.

  8. 3ZddQlUolu6bbCf1
    3ZddQlUolu6bbCf1
    xAQK3X2XPrJcNe4L
    KD6XNuZ4ibJMTsnj
    • Lightly pull down on the plastic base to unplug the sun visor.

    • Depending on the make of the sun visor, you may need to also press on a tab located underneath the plastic base.

    • Set the visor aside.

  9. q2hUWGkUwdCTaKQo
    q2hUWGkUwdCTaKQo
    ueflQDNbM3XkFGJi
    EWtYclOZIgCUhb3L
    • Press down on the front clip to release the visor bracket cover from the mounting bracket.

  10. LxsvdxUEuuqCTkbM
    LxsvdxUEuuqCTkbM
    RIopPJZDSc6JNDpJ
    • Slide the C-shaped cover off the bracket through the open end.

    • You may need to pull it if it doesn't slide off easily.

  11. p1VJBSaRchowBucs
    p1VJBSaRchowBucs
    l3NmWPipQDtH2PBU
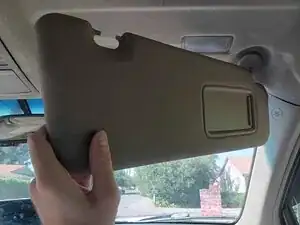
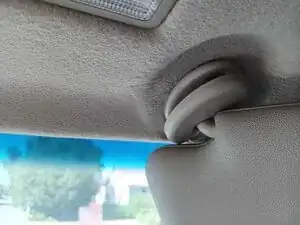
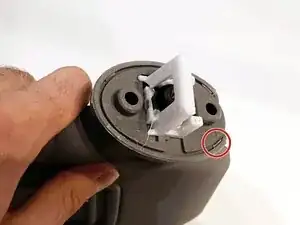
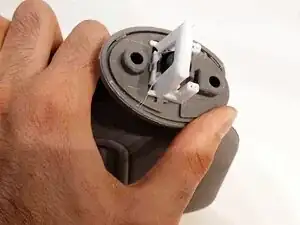
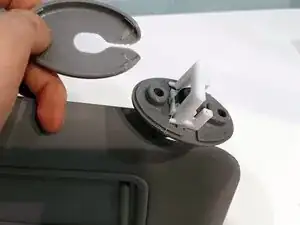
    • Lift the replacement visor to the socket on the sealing, ensuring the plastic base and screw holes are aligned.

  12. IQOg3UOoFkPZOPHg
    IQOg3UOoFkPZOPHg
    dSfOEvy5QadrflNk
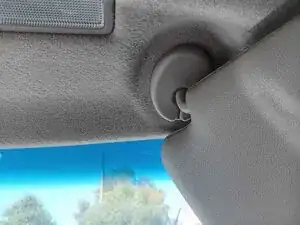
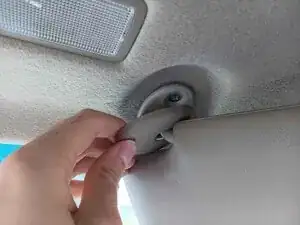
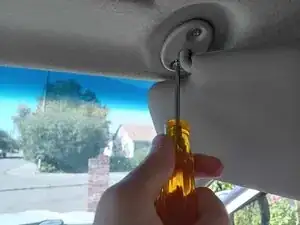
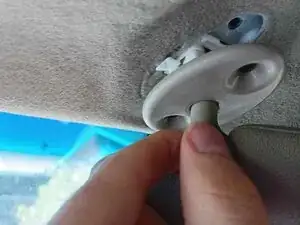
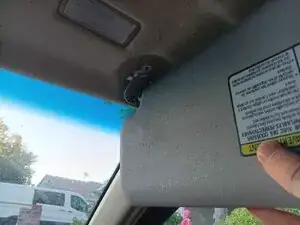
    • Push the sun visor connector into the socket until it sits flush with the ceiling.

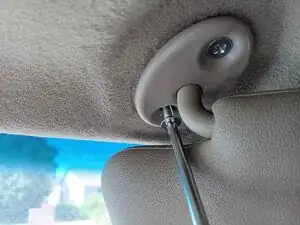
    • Use a Phillips #2 screwdriver to tighten the screws and secure the sun visor connector.

    • Remember to slide the C-shaped bracket cover over the top of the connector.

Conclusão

To reassemble, follow these instructions, starting from step 7, in reverse order.

Leo Morozov

Membro desde: 23/09/25

205 Reputação

0 comentários