Introdução
If the rear cigarette lighter in your 2006 Chevy Trailblazer LT isn’t working, use this guide to replace the rear cigarette lighter fuse.
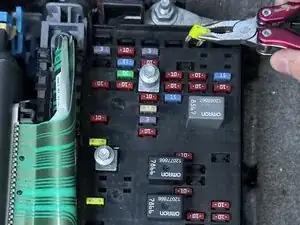
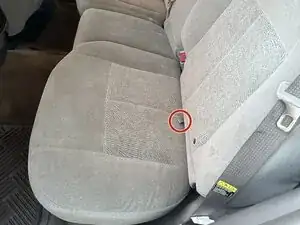
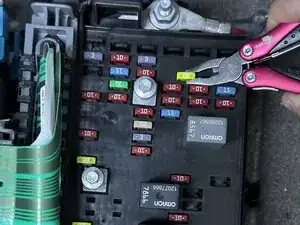
The rear cigarette lighter fuse is a yellow 20-amp fuse located near the rear passenger seat. The fuse protects the circuit for the cigarette lighter, so a blown fuse will prevent the lighter from working and stop any connected devices from receiving power.
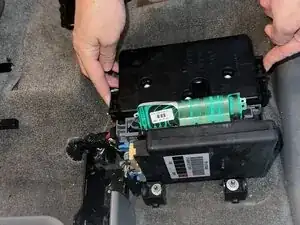
Before beginning this repair, make sure the car is turned off to avoid electrical issues. No special tools or skills are needed beyond basic pliers. You will need a replacement 20 amp fuse. Take care not to damage the fuse, the black fuse box cover, or the gray box cover during removal and reassembly.
This guide walks you step by step through locating the fuse, removing the blown fuse, installing a new one, and safely reassembling everything.
Ferramentas
Peças
-
-
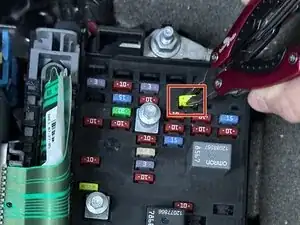
Use a fuse remover tool or pliers to remove the 20 Amp cigarette lighter fuse.
-
Pull straight up to remove it.
-
-
-
Take the new 20 amp fuse and insert it into the same slot where the broken fuse was removed.
-
Once the fuse is aligned with the socket, push it down into the slot until it is fully inserted.
-
-
-
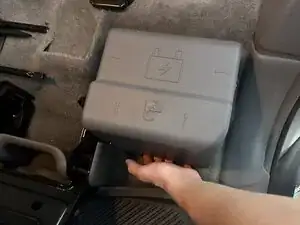
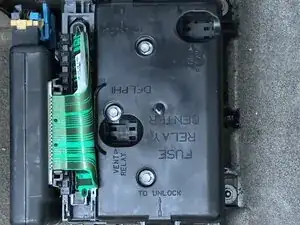
Replace the black box cover.
-
Press the cover down until it clicks into place.
-
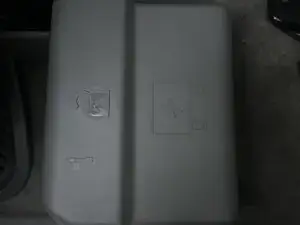
Replace the gray cover of the fuse box.
-
Ensure the cover is aligned with the box and then press down until it clicks securely into place.
-
Lift the seat bottom back into its original position.
-


You have now successfully replaced the fuse and reassembled all components.