Introdução
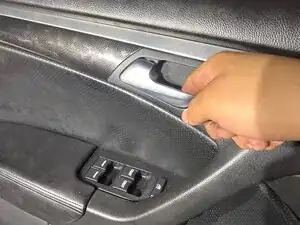
My dad has an Acura TL, a current problem he is dealing with, not being able to open his door from the inside. He has to lower his window and reach outside, and pull the door handle to get out. This is a common problem with these cars, and I've looked all over the place for instructions on how to fix/replace one, but could never find any.
-
-
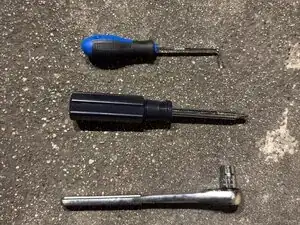
The tools needed to complete this project
-
Screw driver
-
Ratchet with 10 mm socket
-
Prying tool
-
Curved hook pick
-
-
-
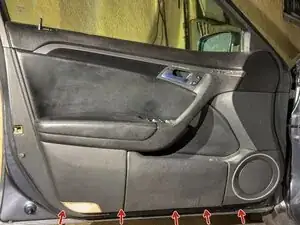
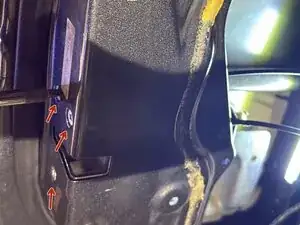
For step #1, you will need to locate all your bolts to remove the door panel to have access to the cable.
-
-
-
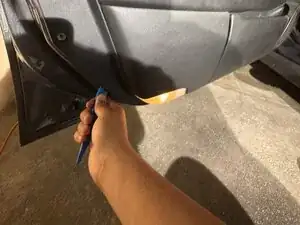
For your step #2, you will start to unclip the door panel by using your car trim removal tool kit. FYI, start from the bottom.
-
-
-
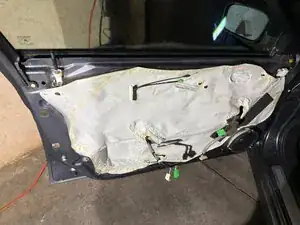
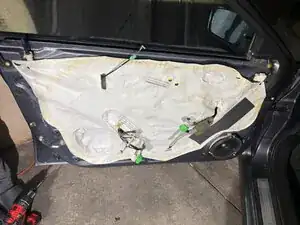
For your step #3, this will be one of your most important steps, which is disconnecting the wires from the door panel to give you more room to work with. Don't rush this step. Take your time; you don't want to rip or mess up one of the wires.
-
Caution: These are electrical wiring.
-
-
-
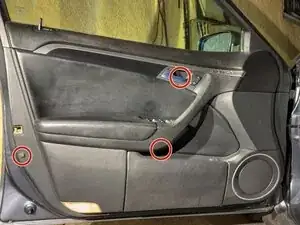
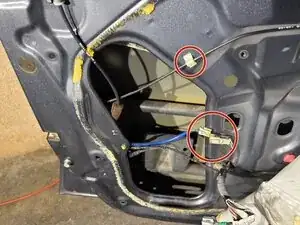
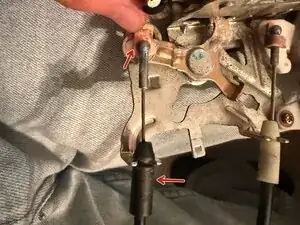
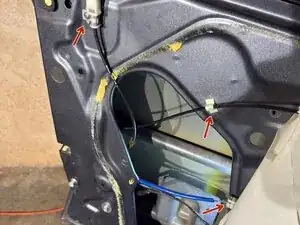
For step #4, in picture 1, remove the white protective liner behind the door panel to gain access to the bolts that hold the door lock actuator in place.
-
The bolts that need to be removed are circled in red.
-
-
-
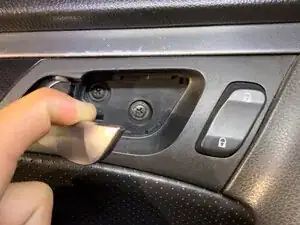
For Step #5, you will have to unplug the last wire as well the clip holding the most important cable the door cable.
-
-
-
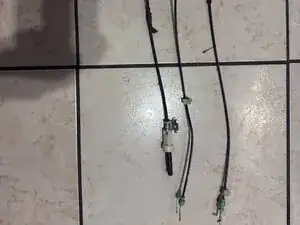
For step #6, once you have removed your door lock actuator, you will replace the broken cable with a new one.
-
To remove, you need to remove one bolt that is holding the plastic housing. In picture 2.
-
In order to remove the cable, you have to unclip the pink clip and push up on the black rubber piece.
-
-
-
For step #7, you will start by putting everything back in reverse order. First, you put back the main bolts.
-
As well as plug back in the cables and clips.
-
-
-
For step #8, put back the liner and pass through all cables. And connect all plugs back to their original postions.
-
When putting back your door panel, make sure the door is 100% in place before bolting it back on.
-
-
-
For the final step, just enjoy your new properly working door handle.
-
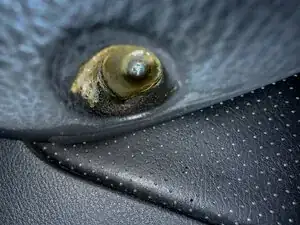
Picture 2 is my fix, and Picture 3 is the broken part.
-


To reassemble your device, follow these instructions in reverse order.
